
Blurb Book
Week One – Today we met Jane for the first time, she introduced herself to us and told us what work we would be doing with her, and what would be expected of us in the end. So, to start off with we went down to the studios to take photos of our work, our photos needed to be in high resolution so when we would finally print out our Blurb Book the photos in it would be of a high quality. We went back to the computer room and started looking at books that Jane had brought in for us to look at, as examples. Some of the books were beautiful and it gave me a better idea of what I wanted my final book to look like. So as soon as I got home I started experimenting with typography and different types of paper and colour, this helped me a lot and I was looking forward to next week.


Week Two – Today we were tracing different things that we might want in our blurb book, so again this week we were experimenting with ideas and thoughts. I enjoyed the tracing process and found it very therapeutic. It was also giving me a better idea of what I wanted in my blurb book and what I definitely didn’t want in it, and by looking at my work this way I decided what sort of work I liked and didn’t like too.
Week Three – This week again we were still getting our ideas for what we wanted to be in the blurb book. I wasn’t happy with all the photos I collected so I went back down to the studio to take more photos of my work, close-ups etc. I started to develop the photos and carry on tracing them, I started adding more stuff to my sketch book, photos and traces I had collected.
Week Four – Today’s the day, I get to start the blurb book. I don’t think ill have enough time to finish it all today but I will do most of it at home where I will have my own space to decide properly what I want it to look like.
I was quite happy with the outcomes of my blurb book, but if I had more time I know it would be a million times better. I have realised it is a brilliant way to show your work also, and I will definitely be using this again. 


Printing
Week One – I was looking forward to be going into the print room again this year, so I was enthusiastic about today. To start off Darren was helping is get back to grips and helping the others in the class that had never been in the print room before. He explained what the aim was for the six weeks and explained what was expected of us. I got going just getting back to grips with the rollers and how I needed to use everything. I have learnt today that I am very heavy handed. I kept on smudging everything with my bloody hand. Patience were running low because nothing was going my way, but after today I know what to expect for next week, and I know what I need to do.
Week Two – Today we experimented again and got to try out new things, I started making little pieces that connected my studio work to my print work, I found it really hard to try and make a print without knowing what I was doing! I need to let go a little bit and stop being so controlling.
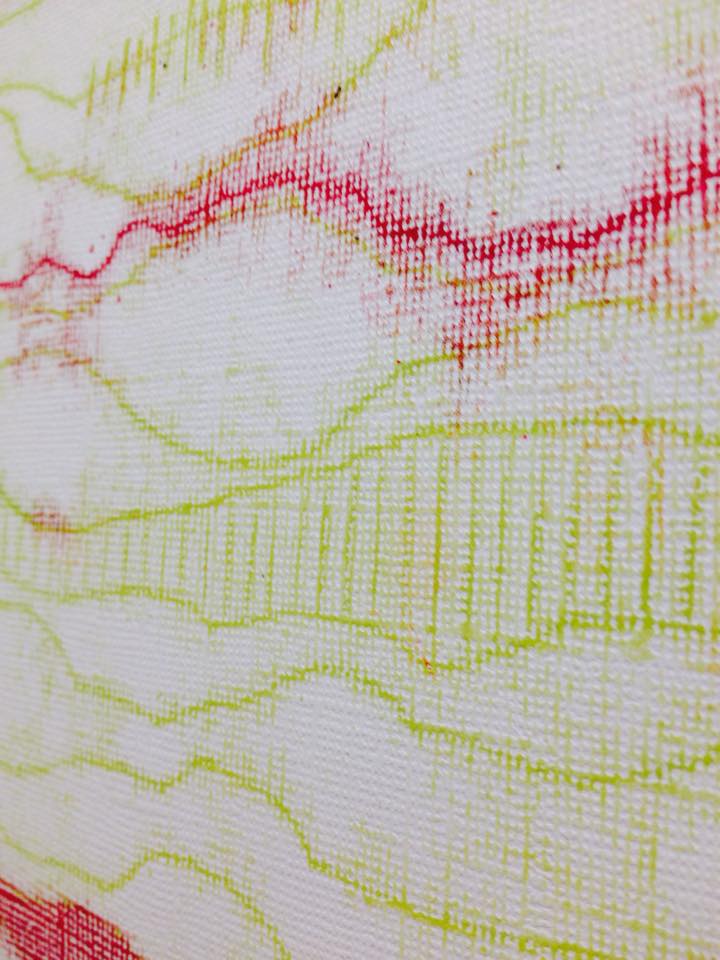
Week Four – I’m really happy with the outcome of my prints this week, they are simple prints on watercolour paper, I’m interested in the affect you get when printing on this sort of paper, as you can see from the photo below, the marks and lines have started the bleed into on an other, I am happy with this effect and it happened by chance.


Sculpture
Week One – Today was a really enjoyable day. Our first day in the workshop, and since I left foundation I hadn’t been anywhere near the workshop, only to steal some wood here and there. So, Owein started by going through the health and safety regulation etc, but that didn’t go on for too long. I decided to make some small maquette’s, just try and experiment with different sorts of metals, and just simply give everything a go. I was happy with the outcome of my work and I left the workshop on a high, and ready for next week.
Week Two – After last week, with how it went I am really looking forward today. There wasn’t many of us in so it would be easier to move around and use the tools in the workshop, so that was a plus too. Owein showed us how to weld this week and he wanted us to give it a go. So I started off carrying on with the riveting we did last week, then when i felt confident enough I went on to try and spot weld. Well, it was scary, and I was absolutely hopeless at it! I made such a mess and melted the copper, but the outcome was beautiful, the colours were amazing, I am happy again with the outcomes of this week and looking forward to working there again next week.![IMG_3787[1]](https://hannagreenhalgh.wordpress.com/wp-content/uploads/2015/04/img_37871.jpg)
![IMG_3827[1]](https://hannagreenhalgh.wordpress.com/wp-content/uploads/2015/04/img_38271.jpg)
![IMG_3836[1]](https://hannagreenhalgh.wordpress.com/wp-content/uploads/2015/04/img_38361.jpg)
![IMG_3791[1]](https://hannagreenhalgh.wordpress.com/wp-content/uploads/2015/04/img_37911.jpg)
![IMG_3835[1]](https://hannagreenhalgh.wordpress.com/wp-content/uploads/2015/04/img_38351.jpg)
![IMG_3790[1]](https://hannagreenhalgh.wordpress.com/wp-content/uploads/2015/04/img_37901.jpg)
Video
Week One –
https://www.facebook.com/hanna.greenhalgh/videos/10152746229417205/?l=1406078352758306633


Importing still images
You can import individual still images into Premiere Pro or import a series of still images as a sequence. You can import still images from Adobe applications such as Photoshop and Illustrator. For information about the still-image formats that Premiere Pro imports, see File formats supported for import . An imported still image uses the duration specified in the Still Image preferences. You can change the duration of a still image in a sequence. The maximum frame size that can be imported for still images and movies is 256 megapixels, with a maximum dimension of 32,768 pixels in either direction. For more information, see this post on the Premiere Pro Work Area blog. Preparing still images before importing Before you import a still image into Premiere Pro, prepare it as completely as possible to reduce rendering time. It’s usually easier and faster to prepare a file in its original application. Consider doing the following: • Make sure that the file format is supported by the operating system you plan to use.
• Set the pixel dimensions to the resolution you will use in Premiere Pro. If you plan to scale the image over time, set image dimensions that provide enough detail at the largest size the image has in the project.
• For best results, create files with a frame size at least as large as the frame size of the project so that you don’t have to scale up the image in Premiere Pro. Scaling an image larger than its original size can cause loss of sharpness. If you plan to scale up an image, prepare it at a larger frame size than the project’s. For example, if you plan to scale up an image 200%, prepare the image at double the project frame size before you import it.
• Crop the parts of the image that you don’t want to be visible in Premiere Pro.
• If you want to designate areas as transparent, create an alpha channel or use the transparency tools in applications such as Photoshop or Illustrator.
• If final output will be shown on standard television screens, avoid using thin horizontal lines (such as 1-pixel lines) for images or text. These may flicker as a result of interlacing. If you must use thin lines, add a slight blur so that the lines appear in both video fields. See Interlaced video, non interlaced video, and progressive scanning.
• Save the file using the correct naming convention. For example, if you plan to import the file into Premiere Pro in Windows, use a three-character file name extension.
• When you prepare still images in applications that support colour management, such as Photoshop, colours may appear more consistent between the application and Premiere Pro if you prepare images in a video-friendly colour space, such as sRGB or NTSC RGB.
Working with bins
The Project panel can include bins, which you can use to organize project contents in much the same way as folders in Windows Explorer or Mac OS Finder. Bins can contain source files, sequences, and other bins. As your project grows, you can make new bins to contain those items. While it is not absolutely necessary to create and use bins (especially with short-form projects), most editors find them indispensable for staying organized. You may want to use bins in the following ways:
• To store offline clips for batch capture.
• To store main sequences and backup sequences.
• To organize files by type, such as video, still images, and audio files.
Adding and deleting bins
• To add a bin, click the New Bin button at the bottom of the Project panel. You can also use the keyboard shortcut Control+/ (Windows) or Command+/ (MacOS).
• To delete one or more bins, select the bins and click the Delete icon at the bottom of the Project panel. You can also delete bins by selecting one or more bins, and then pressing the Delete key
Render and replace media
Premiere Pro attempts to play back all sequences, clips, effects, transitions, titles, and any other unrendered elements in real time without first rendering them. However, it’s sometimes necessary to render media files, especially VFX-heavy sequences, to enable smooth playback. Also, rendering any unrendered media elements of the Timeline reduces the dependence on the available system resources. The Render and Replace feature in Premiere Pro lets you flatten video clips and After Effects compositions, speeding up the performance of VFX-heavy sequences.
At any point, you can revert to the original clip using the Restore Unrendered feature. Render and replace media in a sequence
1 Open the sequence containing the media to render in a Timeline panel. 151 Managing assets Last updated 12/16/2014
2 With a Timeline panel active, select Clip > Render And Replace.
3 In the Render And Replace dialog, you can choose the format and settings based on which the sequence is rendered. Source Match the settings of the rendered media with the sequence settings, individual clip settings, or presets. Sequence Uses the frame size, frame rate, field type, and pixel aspect ratio of the selected sequence, and renders the matching clips to these settings. For clips that are larger than the frame size of the selected sequence, portions that are not visible within the boundaries of the sequence frame are cropped. If the codec does not support alpha channels, transparent areas appear black after rendering. Individual Clips Uses the frame size, frame rate, field type, and pixel aspect ratio of each individual clip in the sequence, and renders them using their individual settings. When the source cannot be matched, the clip is not rendered. Preset Uses the frame size, frame rate, field type, and pixel aspect ratio of the chosen preset and renders all clips to these settings. When the sources cannot be matched, the clips are not rendered. Format Select a file format that gives the best quality playback while keeping an optimal rendering time and file size. You can choose from MXF OP1a files, MXF OP1a files in DNXHD format, or QuickTime format. Preset Based on the format you choose, select an available preset.
Note: The only preset that supports alpha is the GoPro CineForm With Alpha preset. All other presets flatten any alpha channel. Destination Specify the path to the save the rendered file. You can save the rendered file alongside the original media, or, click Browse to navigate to a location other than the default. Include Handles Specifies the number of additional frames to retain before the In point and after the Out point of each rendered clip. You can set a value from 0 to 100 frames. For example, a value of 30 means that 30 frames are retained before the In point, and 30 frames are retained after the Out point. Handles function as extra frames that allow for additional minor adjustments to the edits in the new project.
4 Click OK. The rendered file is created in the selected destination.
